Create data-driven WordPress pages for each location in your Store Locator Plus locations table. The layout that builds the initial pages can be modified and pages created, or re-created, en- masse. Once the initial Store Pages have been created they can be modified on a per-location basis.
You must have the Experience Add-on to change the Search Layout appearance, and along with other add-ons, also allow you to to use the shortcode on SLP WP page.
These shortcodes only apply to the Search Layout admin setting when you have the appropriate Add-on installed and activated.
slp_search_element
This shortcode provides a simple mechanism to place standard search form elements on a custom search form layout, including the wrapping divs and classes around labels and input fields.
Store Locator Plus comes with a variety of styles to provide a basic style framework that will attempt to match your locator page to various WordPress themes installed on your site. You can see the list of Locator Styles under the Store Locator Plus Settings / View panel. The inner slide bar will show you more.
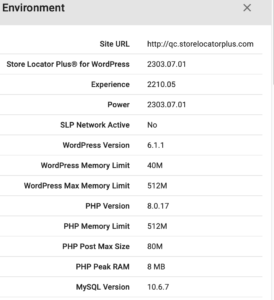
The plugin environment shows the versions of Store Locator Plus, and any active SLP add-ons you have installed, as well as the WordPress version, php version, MYSQL , the domain name and other useful data
This information is required when posting in forums. You can find the release versions under your account Downloads List, and/or review the Release details to see if you have the most recent version of Store Locator Plus and the various add-on packs.
Location Imports are handled via a CSV file for users that signed up for the MySLP Professional SaaS service or are using the WPSLP Power Add On with Store Locator Plus plug-in for Word Press current version. With MYSLP the import feature is under the StoreLocatorPlus sidebar/locations as shown in screenshot. If you are using WPSLP self managed and have the Power add-on it will look similar.
CSV Import Format
Getting the proper CSV format can be a challenge when using spreadsheet apps like Excel or Numbers. Here are some tips to getting a valid CSV format out of a spreadsheet app:
Make sure you always have a header row. That tells the import process what data is in each column. The column headers have meaning, so be precise.
When a cell is a text field that STARTS WITH A LEADING ZERO, make sure you explicitly mark the cell as text. The easiest way to do this is to type a single apostrophe then the number when adding data to the cell as in ‘01886 for the zip code 01886.
Always export with UTF-8 support enabled.
Export to a CSV format. Comma delimited not tab delimited and quoted strings if given the option.
Check out the Example CSV Imports post to get some usable import files you can play with.
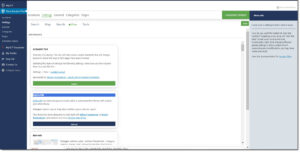
The bubble layout setting allows you to change the content and layout of the popup information bubble that appears when someone clicks a map marker or in the results below the map or hover. There are additional functionality such as “Hide Info Bubble” if you have Enterprise Level or Premier subscription
For the PLUG-In do t yourself version of Store Locator Plus you will need the Experience add-on and use shortcodes. These are not generic WordPress shortcodes. For the SLP SaaS customers you will need to have a Professional or Enterprise level Plan to change layouts.
All of the bubble layout shortcodes follow this syntax:
The Premier add-on, available exclusively to Premier Subscription members, allows the Store Locator Plus locations to be associated with WooCommerce products. You can find details on how to associate the products with the locations in our Associating WooCommerce Products With Locations article. This article explains how to display products along with a “buy now” link in your Store Locator Plus location results.
Requirements
You will need the following products installed and active on your WordPress site:
As long as you have WooCommerce installed and activated and the products SKUs you have associated with your locations, Store Locator Plus will automatically output a Buy Now button that is preceded by the product title and pricing any time you use the special [slp_location woo_buy_links] shortcode in your Results Layout or Info Bubble Layout in Store Locator Plus.
The Experience add-on pack provides a setting on the admin interface of WordPress where you can edit the Results Layout and place the WooCommerce product buy buttons anywhere you would like in the results listing.
If a location has multiple products associated with it, the products are listed on-after-another in the area where you put the [slp_location woo_buy_links] shortcode.
The following is a simplified output for the location details that includes the buy button links.
The pricing for the products will be based on the pricing data provided in the woo_products field for the location. If only a SKU is present the default pricing for the product will be used. If a per-location price has been provided for a SKU then the per-location price will override the default price when the item is added to the cart. See the Associating WooCommerce Products With Locations article for more details.
Styling The Results
In addition to being able to to add your own DOM elements with custom class names and IDs, the Premier add-on also uses a rudimentary span-in-dive layout for the WooCommerce product information.
The default layout is a div of class woo_buy_block followed by three independent spans of class “woo_product_title” , “woo_price”, and “woo_buy_link”. These divs will be stacked on top of each other within the results layout.
You can use the CSS Editor provided by the Pro Pack , upload your own custom CSS file to your WordPress theme or the Store Locator Plus plugin directory, or use the CSS Editor that is provided by many WordPress Themes to override the general look-and-feel of the WooCommerce product links presentation in the location results.
Associating Store Locator Plus locations with WooCommerce products is a new feature provided by the Premier plugin for Store Locator Plus. The Premier plugin is an add-on that is available exclusively to Premier Subscription holders.
In order to activate the WooCommerce product mapping features of the Premier add-on, you will need to WooCommerce installed and activated on your site. When WooCommerce is installed the WooCommerce modules are automatically activated within the Premier add-on. You should activate WooCommerce before importing locations with WooCommerce product relations.
Buy Here For WooCommerce is a free WordPress plugin that allows you to associate Store Locator Plus locations with WooCommerce products. When customers search for physical locations they will see a list of products offered at that location.
This document describes the initial installation and setup for Buy Here For WooCommerce.
Install The Required Plugins
Login to your WordPress site and go to the Plugins / Add New screen.
Search for “Buy Here For WooCommerce” from the WordPress Plugin Directory. Install and activate that plugin.
Note: Buy Here For WooCommerce requires Store Locator Plus 4.4.18 or higher and WooCommerce 2.4.10 or higher. If either are not installed or are not activated the Buy Here For WooCommerce plugin will not activate.
From your WordPress admin login go to Store Locator Plus, go to the Locations tab and Add Locations.
Add Products
From your WordPress admin login go to WooCommerce Products and Add Products.
Connect Locations To Products
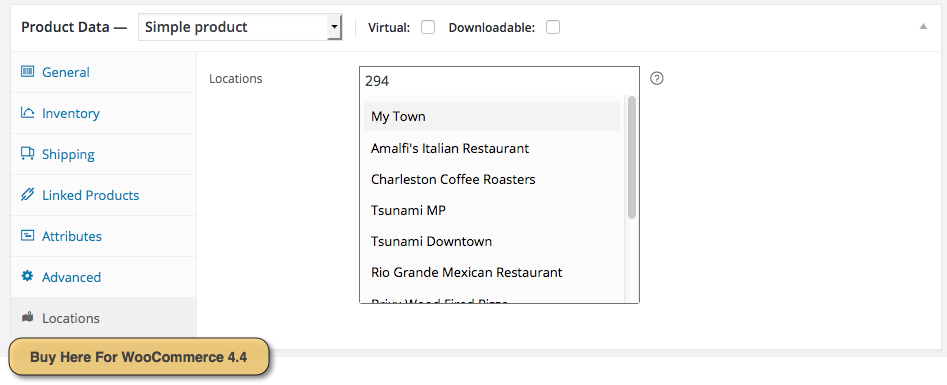
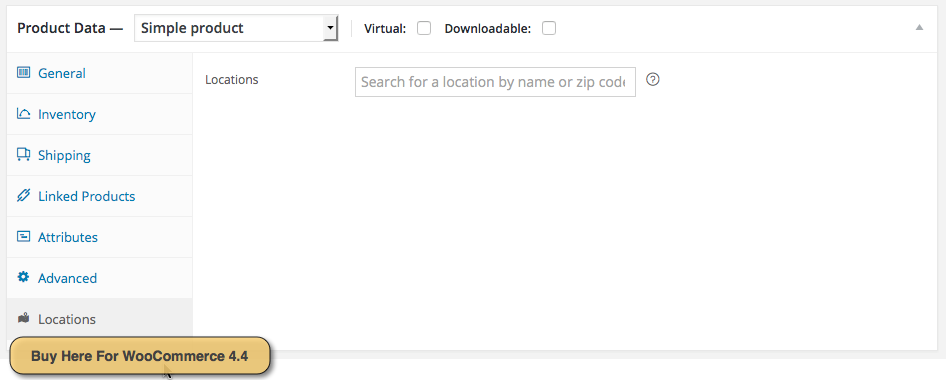
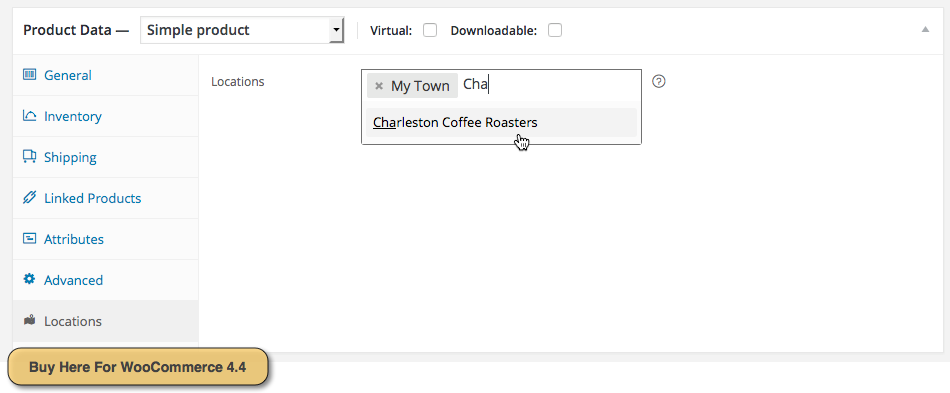
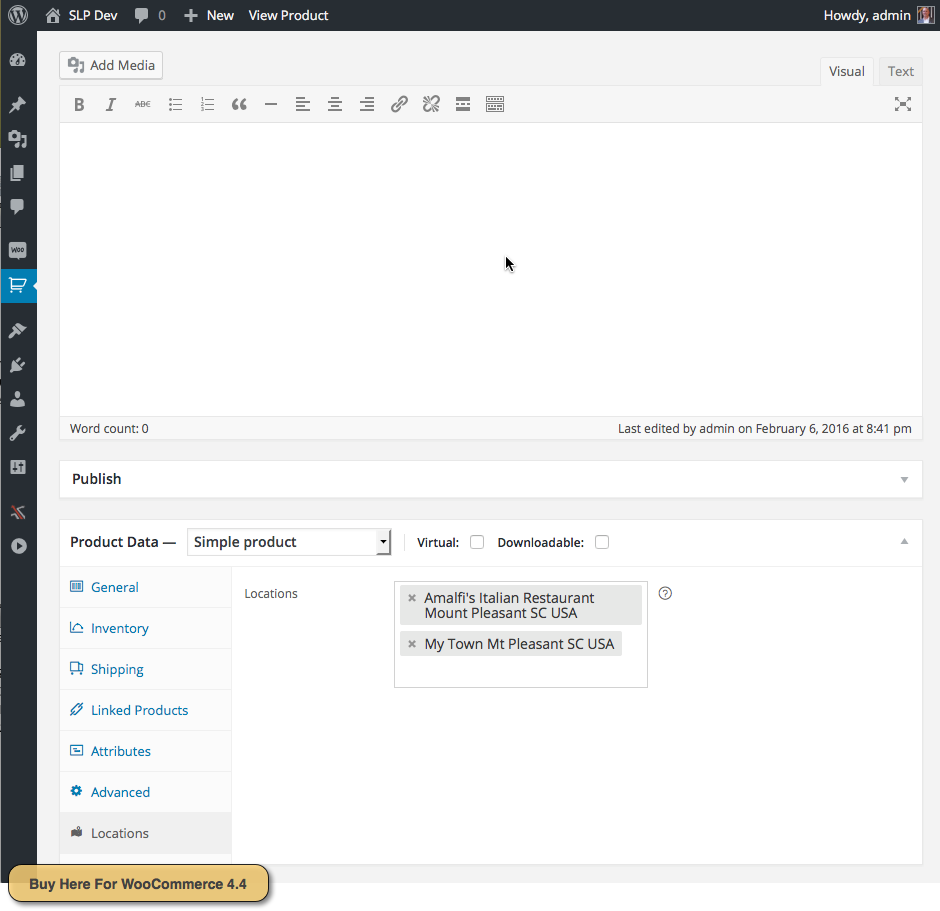
While adding a new product, click the Locations panel in the Product Data section.
Start typing the name of a location or the postal/zip code. When you type the 3rd letter a list of Store Locator Plus locations that match your search will appear. Select a location that you wish to have associated why the product.
BHWC Location Search In Progress
BHWC Initial Location Selection Interface
BHWC Associating Second Location
BHWC Add Location To Product
Create A Locations Page
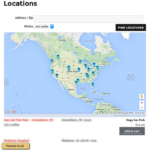
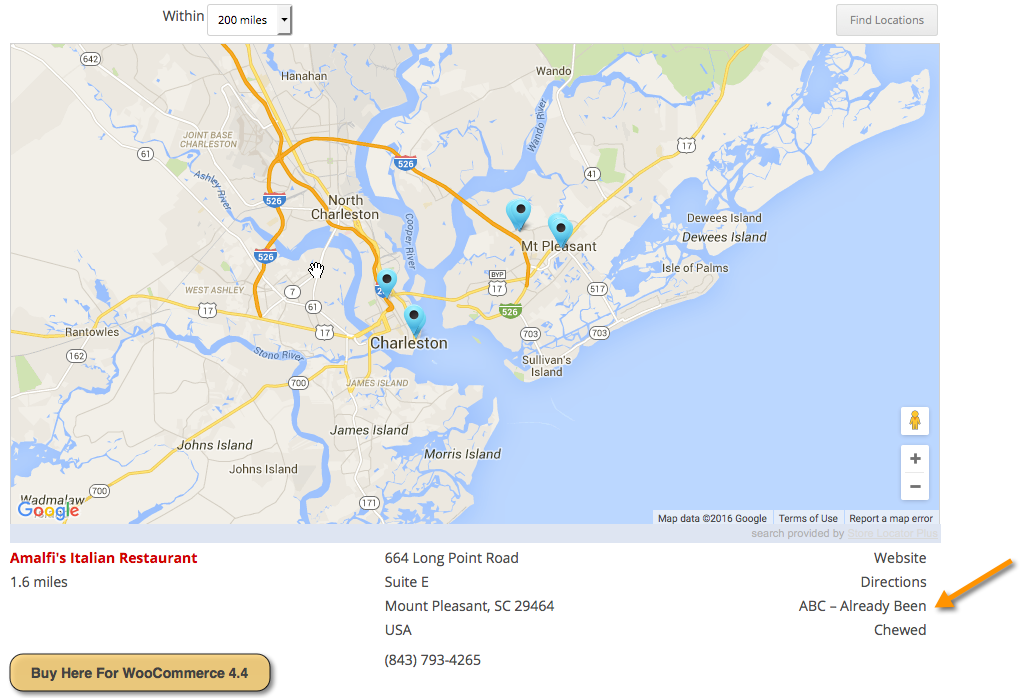
Go to Pages and add a new page. On that page put the [slplus] shortcode.
Open that page to see your location search form, map, and list of locations.
Locations that have product data associated with it will show the product data under the details column on the right side of the location listing.