You can change the built-in Google map view to any that Google has to offer “hybrid, road map, satellite (aerial), terrain” The settings are under Store Locator Plus/ Settings/Map ,scroll down to the section under Appearance and use the drop down under Map Type to change and then save changes.
If you are on MYSLP you will see the StoreLocatorPlus panel in the left admin panel, select settings/map.
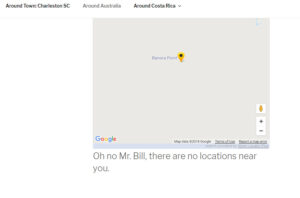
The text that displays when there are no locations to be displayed can be changed under Settings/Results in the section under Appearance. Type a message in the box to whatever you want the site visitor to see when there are no results found.
Example of the text added under the SLP Settings/results and how it appears to the site visitor front end when no locations or results found:
The directory feature of the Power add on allows you to quickly build a directory-style listing on your pages to show a list of cities, states, or countries where you have locations.
The [slp_directory] shortcode used to build this listing can be combined with a landing_page attribute to quickly refer your site visitors to an interactive map showing your locations in the selected city, state, or country.
If you have the Power Add-on in addition to the Experience Add-on you have additional fields that can be displayed with the use of shortcodes and attributes.
Contact Fields
The Power Add-on has Contact Fields that can be associated with your locations for adding internal special ids for updates or to add filters. The contact fields will not automatically appear in your results on the front end.
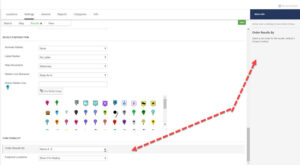
The Store Locator Plus default is to show the order of the results below your map by distance, i.e. closest to thesearched address listed first. With the Experience Add-on or the Premier Add-on the “order by” options allows you to display the results in a different order. With the Experience add-on (if you are using WordPress SLP) or the Professional Plan (if you are using the MySLP Subscription) the results order by options are under your Settings/Results/Panel
Closest list the closest to the search address or center of the map (this is the default)
A..Z- alphabetical sort of locations.alphabetical sort of locations
Random- random order of locations, changes on each search
Featured, Rank, Closest
Featured, Rank, A..Z
Featured, Closest
Featured, A..Z
Rank, A..Z
Rank, Closest
Experience add-on allows you to change the order of the results
Store Locator Plus Radius Behavior is set to “always use” in the base plugin or Advance level subscription for SLP SaaS
For additional options you would need Professional level and /or higher for MySLP/SLP SaaS or the Experience add-on for the WPSLP plug-in which allows you to extend the functionality beyond the basic “Always Use” setting. This setting impacts how the radius selector is employed and how locations are filtered before being displayed to the user.
The map radius is set under the Settings /Search tab and the results (after search) is found under the Settings/Results tab”Initial Search radius”. The search radius selection options presented to the user in the drop down menu is set under the Settings / Search tab panel.
Tags are text labels that can be used as identifiers and can be added to any location if you have WPSLP (do it yourself) Power Add On, or with the Professional level subscription for MYSLP. It is a quick and informal way to add filters or for grouping features to your Store Locator Plus locations.
Administration
Settings for Store Locator Plus Tag Search are under the Settings/Search section when you have the Power Add On installed.
Turning On Tag Searching
Tag based searches are off by default. Set the Search Form Tag Input to something other than “none”.
Custom Label For Tag Searching
You can set a custom label for the tag search input. By default the label is blank. Leave blank type in what you want to appear for the Search By Tag Label: entry
Pulldown or Text Input
You can elect to have either a drop down or a text box input for users when filtering results by location tags. The default mode is to allow for free-form text input. To use the other methods you must enter a series of your tags separated by commas.
Providing
An “Any ” Selection On The Tag Drop down
You can also provide an “any” selection which will search for all locations, in addition to the list of tags you enter on the drop down. Check off the “show any” setting and Store Locator Plus will automatically add the phrase “any” to the top of your search list.