Import Locations
Add/ Import Store Locator Plus SaaS Action bars
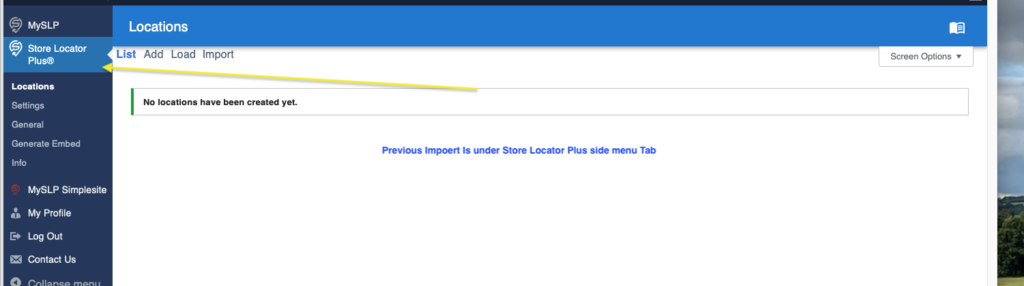
New Menu side bar
For our SAAS users the import button is now under LOCATION DETAILS

for Store Locator Plus®
Stuff under the Settings tab, formerly known as the experience tab.
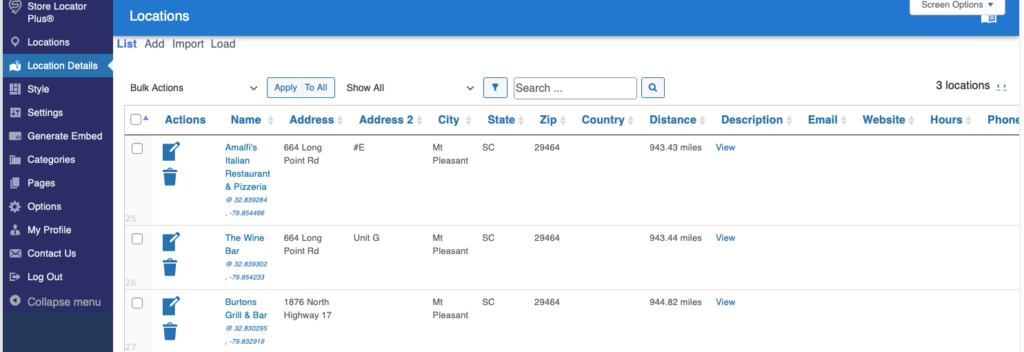
Add/ Import Store Locator Plus SaaS Action bars
New Menu side bar
For our SAAS users the import button is now under LOCATION DETAILS
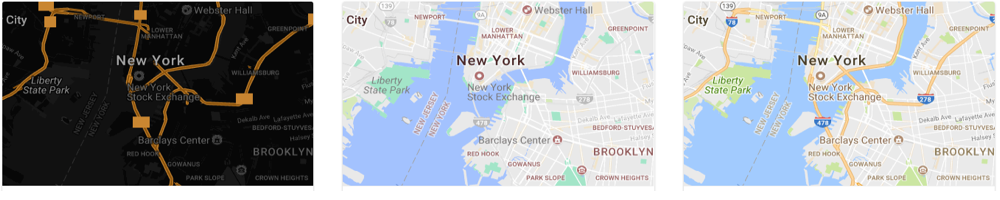
Store Locator Plus® Professional subscriptions support the Google map style rules. These rules let you control the “inner style” of the map itself. You can turn off built-in Google map icons, change the width or roads, change the font size of various labels. Some styles will even change the color of the land and water bodies if you are truly looking to customize the map style to better match your brand. You will find some basic examples of these JSON settings below or you can use the Google styling wizard to create your own custom look and feel.
Settings > Map > Map Style
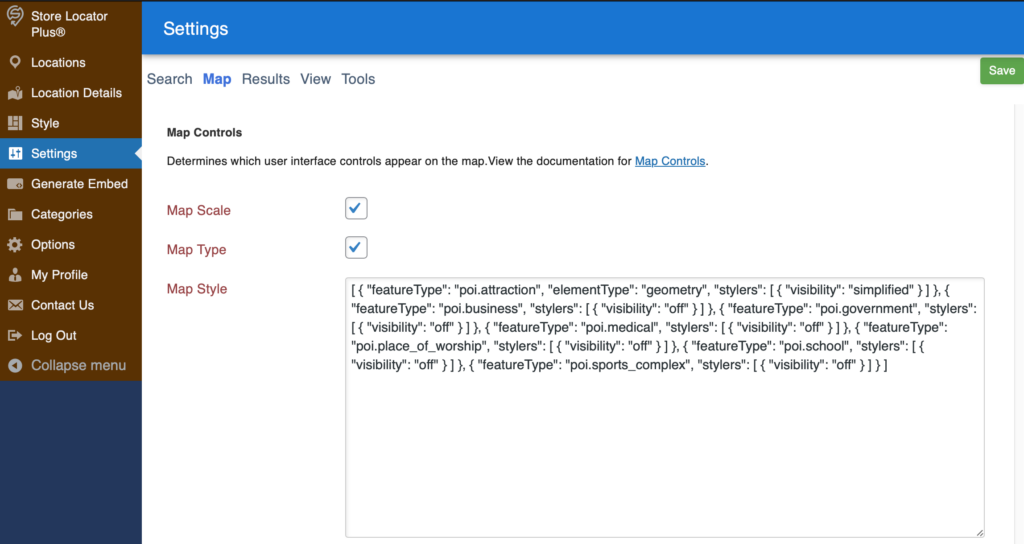
Go to the Legacy Map style wizard to generate the JSON value to copy and paste into this field.
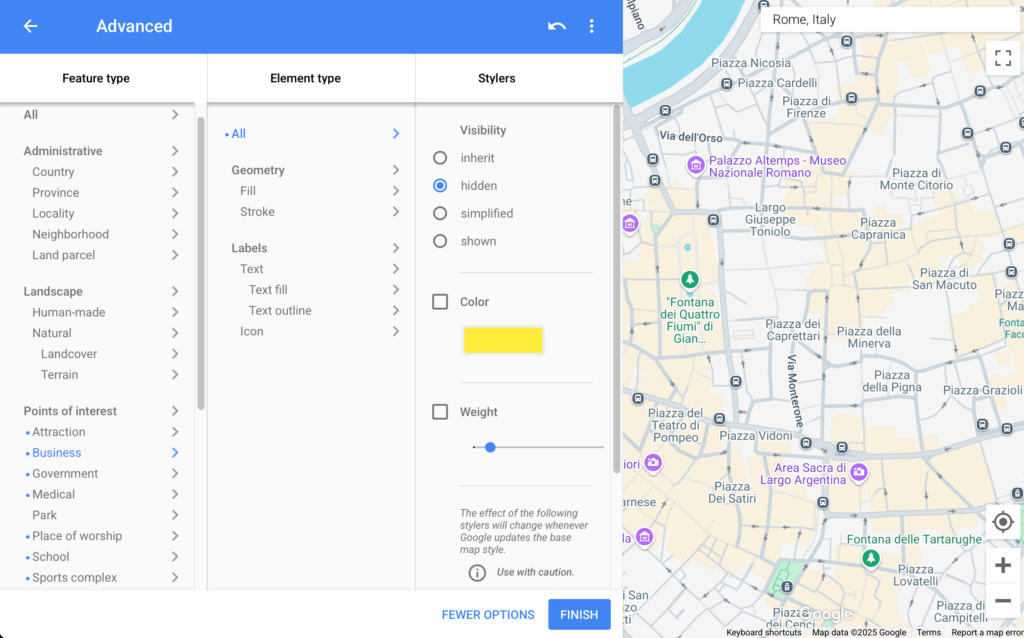
The value of this entry is a Google Maps JSON style string. Some of our Plugin Styles in the Style Gallery will set this for you.
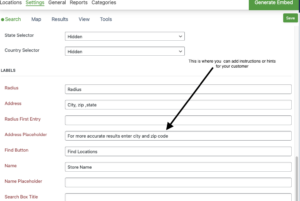
The label that will be displayed in front of the Search form box on your locator page can be changed under Settings/Search in the Appearance section Label. If none are set, a blank box will appear on your site. The “Address” Label you enter will appear in front of the search box. The “radius” information indicates to the site visitor that this is the radius (whatever radii you entered in the search form for radii options.
Consider this label as a help text tool for the site visitor to assist them as to what to enter in the box. Label Examples: zip code, city, street, or a combination such as address / zip code. The more detailed the better. We find address and zip code to be the most useful hint. If you leave this label blank nothing will appear in front of the search form box and your site visitors will be guessing what to enter to start their search.
Additional Search settings and labels are available with MYSLP Professional or Enterprise level or the WPSLP self managed with the Experience or Premier add-ons.
With the WP Add-ons or the MYSLP SaaS professional level plan and higher you will find additional help search boxes such as Address Placeholder.
Changing the results layout is a feature provided for Professional level accounts. Users of the self-managed WordPress plugins will find this in the Experience add on.
The default format for the results string uses the numerical encoding for the various data elements that can be rendered. This default string format is present in the base Store Locator Plus plugin. You can reset to the default at any time by deleting the entry in the Results Layout field under Settings/Results/Appearance and saving the settings.

There are five to seven sections under the Settings/Results tab admin panel depending on which add-ons you have activated. Each section describes when and/or where the results will appear under your map.
Not all of the settings will appear if you have the Advance level plan for SaaS or do not have the Experience and/or the Power add-ons for the basic WPSLP self managed plug-in.
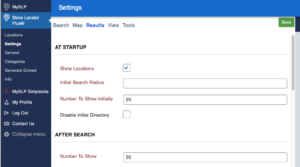
You determine the Number of results you want to appear on the map and locator page as soon as the page loads when you have “Show locations at startup” checked. We recommend 50 for most sites unless you have the Premier add-on or Enterprise level plan (if using MYSLP) which allows less clutter on the map by virtue of “cluster markers”.
The next setting is the radius to search initially when “Show locations at startup” is checked. Leave empty to use the map radius default. Recommended : Set to a large number to search everywhere.
And the third setting is : ” Number to show initially.” How many results do you want to show under the map? This is the part that populates the actual information regarding your locations (under or next to your map depending on the style) with the address, website info, phone, etc.
If you are signed up for the MYSLP, the Professional level plan) additional settings can be enabled , for example do NOT show the results until after a search has been performed”. The setting is labeled “Disable Initial directory”

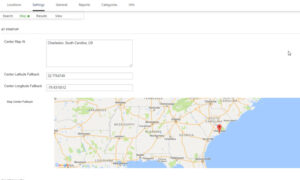
Under the menu for SLP / Settings /Map :
The settings contained in the map panel will change the functionality of the map domain, center map, zoom and appearance.
The following settings are available to manage functionality for both WPSLP stand alone plug-in and MySLP SaaS managed service..
Additional Search settings are available if you are using either:
Word Press Store locator Plus plugin with the Experience Add-on , or the Store Locator Plus SaaS / Professional level plan. have multiple search tool options to display on the front page when a site visitor lands on your locator page. Search by Name is a checkbox that is found under the Store Locator Plus “Settings/Search” menu.
The default is “Name”

With built-in custom CSS rules now standard for most WordPress themes, version 5.4+ of Store Locator Plus® has dropped legacy CSS styles. Up to version 5.4 users could place a CSS file in the Store Locator Plus® plugin CSS directory and then use the Settings | View | Plugin Style to select that CSS file in place of the default “A Gallery Style”.
Copy the CSS from one of the legacy CSS stylesheets listed below an paste it into the Settings | View | Custom CSS box. This requires the WordPress Experience Add on.
Custom CSS support is built into WordPress core and themes only need to tell WordPress they support that option to enable the functionality. Many modern themes now include this option. Go to Appearance | Customize | Additonal CSS and paste the CSS there.
Users of our MySLP SaaS offering don’t have to worry about this sort of thing. The built-in style gallery will suffice for most sites and those that need custom CSS can use the built-in CSS tools provided by platforms like Wix, Weebly, Squarespace, and more.
The Experience Add-on for WordPress SLP plug-in , or the Professional level or higher plan for MySLP Software-as-a-Service application allows you to customize the layouts, the map interface, and the search form to display in a certain manner on the front end of your locator page
Search Layout is found under the Settings tab on the Search panel.
This setting allows the search form layout to be modified via a text setting. If the Search Layout field is left blank the default search form layout and your SLP style is used. If Search Layout is modified the layout will take precedence over most of the Search Form settings and the basic Store Locator Plus.
MYSLP subscriber with the Professional level or Enterprise level plan , allows you to customize the style sheets ( CSS ) for Store Locator Plus map, results, and search layouts. There are additional styles also available with the higher level plans making it less likely that you will need to use custom styling sheets. If you are adding CSS to the SLP. The CSS field is under Settings/View under the various locator styles.
If you are an Enterprise level subscriber and need a style to work with your general theme, you may wish to contact us. Any CSS updates entered will be retained in future updates .
For WordPress SLP plugin users, The Experience Add On is available to purchase for the self managed WordPress SLP plugin , the CSS is stored in the WordPress options table.