Map Settings for Store Locator Plus®

Under the menu for SLP / Settings /Map  :

The settings contained in the map panel will change the functionality of the map domain, center map, zoom and appearance.

The following settings are available to manage functionality for both WPSLP stand alone plug-in and MySLP SaaS managed service..

At Startup

  • Center Map:   This is where you enter an address, or a state, or a location or  a specific latitude and longitude to be displayed as the initial focus for the Map.   If nothing is entered in this box , the default will be the center of the United States .   Google map has determined the center of  United States to  be somewhere in Kansas.  Example:  See Google Localizing the Map:  The geocodes “Toledo” based on the default region (US) to “Toledo, Ohio”  or  one which biases results based on a region set to ES (Spain) to “Toledo, Spain.
  • Center Latitude Fallback: Center Longitude Fallback:  These are the latitude/longitude settings  that will be called if the Google server is “busy” or offline and not able to geocode or “call” to load your locations.  If you reset to blank it will fill in with the Center latitude/longitude of the map domain you have chosen.    You can have a different Lat/long fallback  then your map domain or center map if you  choose.    An image of your fallback will  be displayed

Deploying MySLP :WIX

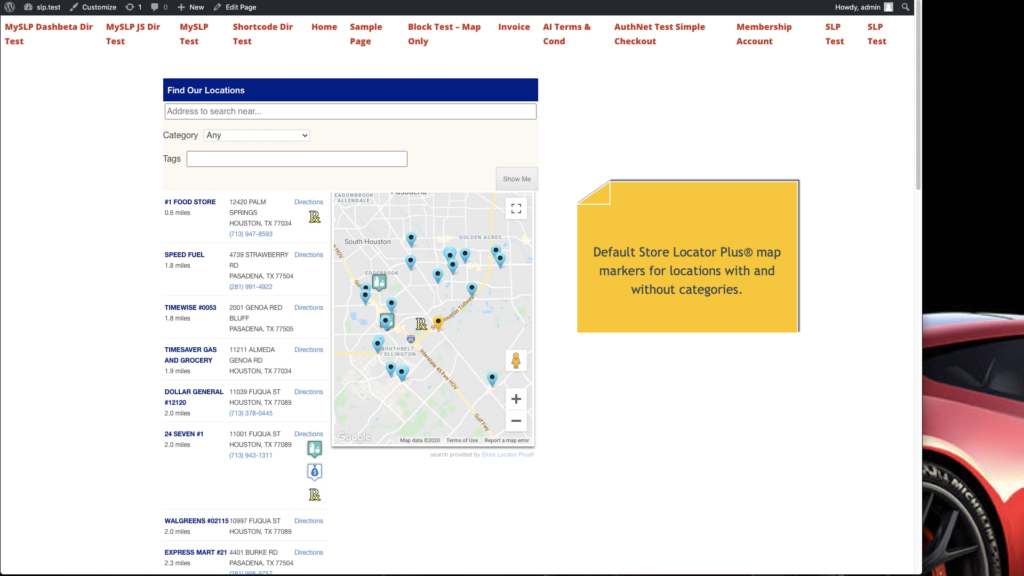
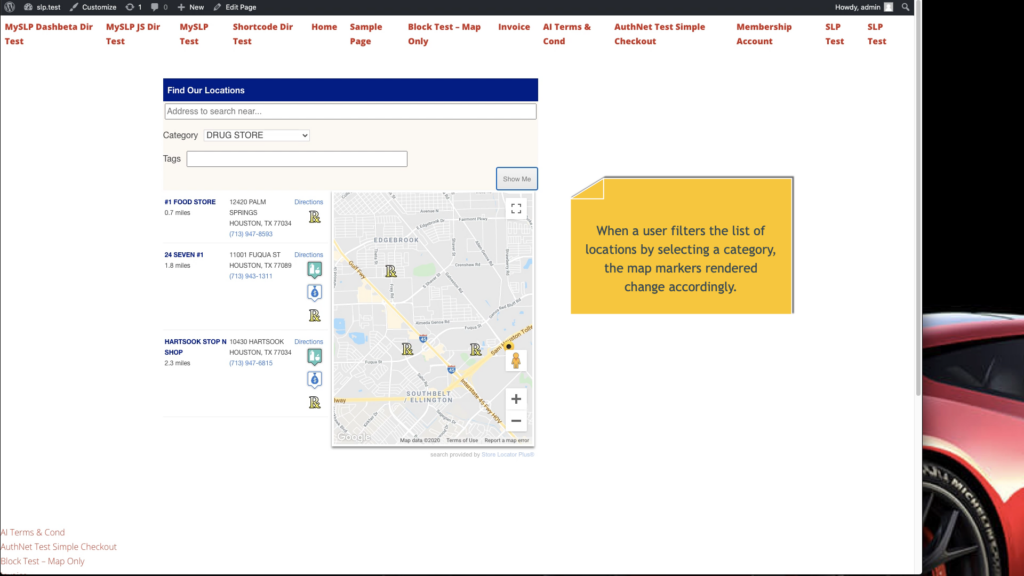
Adding a Store Locator Plus location finder to your Wix site is easy thanks to their HTML Code embed widget.    Follow these steps to get started.

Create A MySLP Account

Sign up for one of the several MySLP account options available.

ADVANCED

$5/month

  • 125 Locations
  • 1,000 Map Views
  • Extra map views billed at $2/200 views
  • Basic locator styling

PROFESSIONAL

$35/month

  • 5,000 Locations
  • 5,000 Map Views
  • Extra map views billed at $5/1000 views
  • Unlimited Categories
  • GPS Location Sensor
  • CSV import and export
  • Full control over search form and results layout
  • Map color scheme and element styling
  • Feature locations
  • Directory listings

ENTERPRISE

$55/month

  • 15,000 Locations
  • 8,000 Map Views
  • Extra map views billed at $5/1000 views
  • Unlimited Categories
  • GPS Location Sensor
  • CSV import and export
  • Full control over search form and results layout
  • Map color scheme and element styling
  • Feature locations
  • Directory listings
  • Scheduled CSV Imports
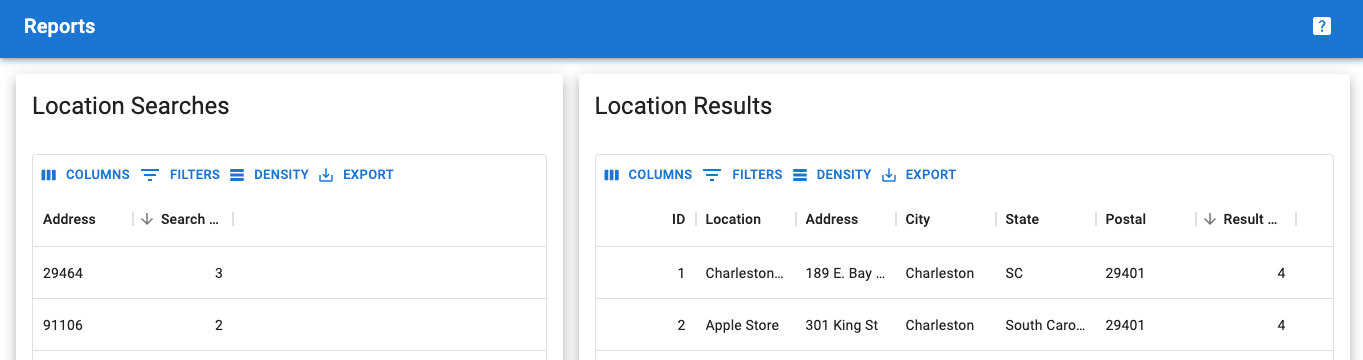
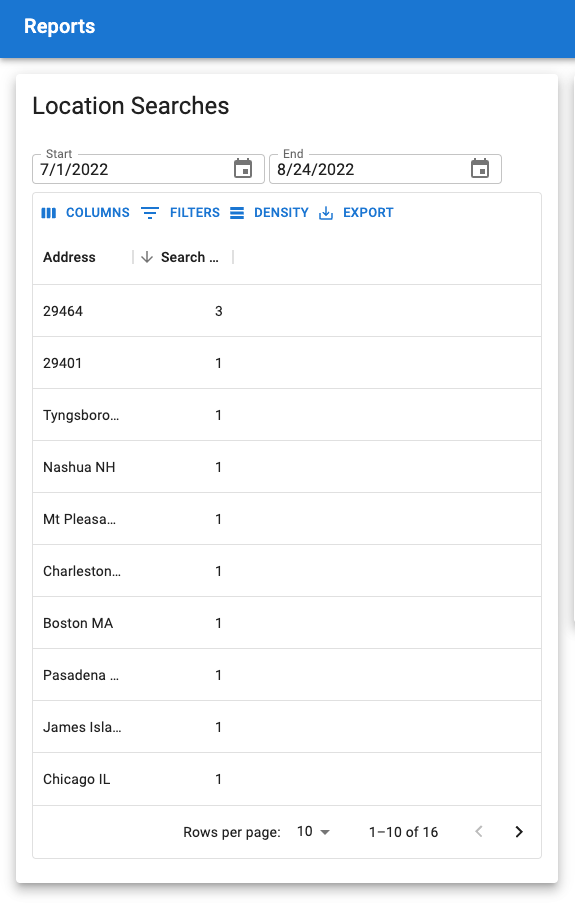
  • Advanced Reporting
  • Territories
  • Cluster Map Markers

Selected PlanEmailPasswordGoodFirst NameLast NameGET PROFESSIONAL FOR $35

Add Some Locations

Log in to your MySLP account and add some locations or use the import feature (for Power or higher level accounts) to add dozens of locations at one time.

Generate Your Embed Code

After you have loaded your locations, click Generate Embed on the top right of the page.

Click “Copy To Clipboard” button once the Generate Embed page is up.

Create Your Wix Site

Go through the process of getting your Wix site started.   They have free accounts and advanced premium accounts available.

Add A Location Page

Go to the top menu bar when you are in edit mode on your Wix site.       Select the “Add Page” menu option and give it a simple name like “Locations”.

Add An Embed Block

After the page is added go the left sidebar in Wix and click on the Plus symbol to add a content block.

Look for the More entry on the bottom of the list and click it.

Choose the HTML Code option on the top of the slide-out panel that appears.

Drag the box and drop it on your page.

Add The MySLP Code

Click on the “Edit Code” button that appears above the HTML Code box.

Select “Code” from the Wix radio buttons listed.

Paste the entire contents of the MySLP Embed Code box you copied earlier from your MySLP login.

Click the Wix “Update” button.

Within a few seconds you should see the MySLP map and locations interface appear in the box.

Resize the box by grabbing the “handles” and dragging it to the edges of your Wix content area.   Make it tall enough to show the search form, map, and results below the map.

Publish

On the top right of the page click Publish.

Done

When you publish the site you will have a new locations page with your MySLP map.  It will be a URL like our  https://icecream393.wixsite.com/best-sc-ice-cream example.

General Settings

(This section has been updated to reflect updates in SLP version 5.5.)

There are settings under the General tab for Admin , User Interface, (Server and Data tabs in  earlier versions,  now are  included under the APP tab).  This documentation has been updated to reflect the Google API changes for our WPSLP self managed plug-in customers.   The tab “App” Map is where you will enter your own Google API keys. MySLP customers do not need to worry about that. We do it for them.

Admin

The Admin tab is where your SLP Premier subscription Accounts ID ,  Log Schedule Messages, and other info is located.  There is also a Reset Manage Locations button available for use to reset the back end Manage Locations  display page to the default view (10 locations per  page view). This feature was previously only available with the free SLP  Janitor Add-on.

Search by Name

Additional Search settings are available if you are using either:

Word Press Store locator Plus plugin with the Experience Add-on , or  the Store Locator Plus SaaS / Professional level plan.  have multiple search tool options to display on the front page when a site visitor lands on your locator page. Search by Name is a checkbox that is found under the Store Locator Plus “Settings/Search” menu.   

The default is “Name” 


WPSLP Premier General Admin

WPSLP Premier customers will need to add their User ID and subscription ID under the Store Locator Plus / General /Admin tab. To find your Premier account information, log into WordPress Store Locator plus account .

Scroll to Premier Subscription Info
Thank you for being a Premier Member. You will need to enter your User ID and Subscription ID via the Store Locator Plus General Settings Tab under the Admin section in order to get the latest updates to the Premier Plugin.

Your user ID is: (A number will be here)

Subscription id is : (numbers will be here)

Legacy Locator Styles

locator stylesheets

With built-in custom CSS rules now standard for most WordPress themes, version 5.4+ of Store Locator Plus® has dropped legacy CSS styles. Up to version 5.4 users could place a CSS file in the Store Locator Plus® plugin CSS directory and then use the Settings | View | Plugin Style to select that CSS file in place of the default “A Gallery Style”.

Adding The Style With Experience Add On

Copy the CSS from one of the legacy CSS stylesheets listed below an paste it into the Settings | View | Custom CSS box. This requires the WordPress Experience Add on.

Adding The Style With WP Themes

Custom CSS support is built into WordPress core and themes only need to tell WordPress they support that option to enable the functionality. Many modern themes now include this option. Go to Appearance | Customize | Additonal CSS and paste the CSS there.

Legacy CSS Styles

MySLP Store Locator Plus® SaaS

Users of our MySLP SaaS offering don’t have to worry about this sort of thing. The built-in style gallery will suffice for most sites and those that need custom CSS can use the built-in CSS tools provided by platforms like Wix, Weebly, Squarespace, and more.

Wix Directory Styling for MySLP

The directory listing option for MySLP makes it easy to provide a list of states in which your locations reside. The directory listing can be easily added to any Wix site by using the directory style presentation when embedding the MySLP code.

The Wix embed code presentation leaves a bit to be desired when it comes to formatting. When you drop an embed block into a Wix page it will often add far too little padding, is not centered, and does not default to a big enough height to display a list of locations.

Getting Started With The Embed Format

When using Wix we find it easier to format the MySLP embed code by using the advanced editor.

Start by adding an Embed , HTML block into the page. Wix will drop this in a random semi-centered location on the page. Drag it down to an available space on the page.

Embedding an HTML object into a Wix site.

It is best to set the embed block to be 100% the width of the content. The gutters should be marked with a dashed line to show the left/right main content width. Stay between the gutters.

Set a default height tall enough to show the listing. An embed box height of 800 is a good start.

Relocate the embed HTML box to the white space of the page. You may need to add the white space to your Wix page by tweaking the height position (Y) of the elements on your page.

Click on the embed box and look for Enter Code on the top-left corner of the box.

Enter the MySLP SaaS embed code, make sure you add <style> section and include a data-presentation=”directory” attribute on the embed script to get the directory listing in place of a map of locations.

Enter the embed code and related <style>..</style> section as noted below.

Example Embedded MySLP Directory Code

The following embed code can be added to ensure CSS styling is included along with the JavaScript-based directory functionality of MySLP.

<style>
.slp_directory_list.slp_directory_style_list {
    display: flex;
	  flex-wrap: wrap;
    justify-content: space-between;
}
.slp_directory_entry {
    padding: 0 5px;
}
</style>
https://dashboard.storelocatorplus.com/front-end/location.js

If all went well you can publish the site and should see an interactive states directory listing similar to this:

WordPress Custom CSS Rules

You can add custom CSS rules to WordPress to style your directories and location maps without having to wait for a custom Store Locator Plus® style or a theme that supports full CSS rules. WordPress has a built-in CSS customization tool that applies to all pages on the site.

You can use this custom CSS tool to do things like format the MySLP SaaS, or WPSLP plugin, directory listings.

How To Add Custom Rules

Login to your site as a site administrator.

Click on the Customize menu entry in the admin toolbar.

Click on Additional CSS in the sidebar.

Enter a fully qualified CSS rule.

This example is used to style the MySLP SaaS directory listings on the site. MySLP is a pure JavaScript embed implementation and requires the site hosting the embed to add extra CSS rules. The output changes the MySLP Directory state selector from a vertical list to a horizontal list as shown on the MySLP Directory page.

Location Directory With MySLP

Our software-as-a-service platform, MySLP, runs on many different web builders and mobile frameworks. If you are using MySLP you cannot easily create pages that contain the [slp_directory] shortcode used in the Store Locator Plus WordPress plugins. There is another way to do this with our SaaS offering.

This new MySLP feature makes it easy to add a directory of locations to any platform. Display your location directory on Weebly, Wix, WordPress, or any website management platform that supports JavaScript.

The Embed Code

When using MySLP you typically add your locations and set your map experience properties. The next step is to go to the Generate Embed page on your account dashboard to get the JavaScript needed to display the locator search form and map on your site.

Standard MySLP output with default embed code.

Embed Code For Directories

When displaying a directory, you normally do not want the location search and map to appear. You can use the data-presentation attribute with your script to tell MySLP what type of location presentation you would like to show on your site.

Here is a full script example from our test server — you can see where we added data-presentation=”directory” to the standard embed script.

<script id="MySLP" 
type="text/javascript" 
src="https://dashboard.test/front-end/location.js" 
data-presentation="directory" 
data-api-key="myslp.8322ee3d5681db51162fa332d76f74171b80b89f7a15df054c989f2d75f91a08" 
data-rest-path="//dashboard.test/enterprise_at_slp_dot_guru/wp-json/myslp/v2/locations-map" 
data-div-id="MySLP-map-wrap">
</script>

Adding data-presentation=”directory” to the script will use the directory style presentation where the <script…> embed appears versus the standard MySLP output.

Default Directory Presentation

The default setup for the directory style presentation is to show a list of states (or provinces) in a list.

Clicking on a state will show a list of locations using the results layout configuration you have set for Store Locator Plus®.

By default there is no search form, map, Store Locator Plus® tagline, or distance displayed.

An example of the Directory output with MySLP SaaS showing results after clicking the FL link.

Styling The Output With CSS

You can style the directory output by manipulating the CSS on the site where the script has been embedded. The method for adding custom CSS will depend on the platform you are using to host your site.

Horizontal List Of States

To create a horizontal list of states, add the following CSS rules (learn more about flex styling at this site) to your site:

.slp_directory_list.slp_directory_style_list {
    display: flex;
	  flex-wrap: wrap;
    justify-content: space-between;
}
.slp_directory_entry {
    padding: 0 5px;
}

Sign Up For Our SaaS Map and Directory Builder Today

Appearance Layouts

Experience Add-On or Professional level MySLP SaaS

The Experience Add-on  for WordPress SLP plug-in , or the Professional level or higher plan for MySLP Software-as-a-Service application allows you to customize the layouts, the map interface, and the search form to display in a certain manner on the front end of your locator page

Search Layout

Search Layout is found under the Settings tab on the Search panel.

This setting allows the search form layout to be modified via a text setting.   If the Search Layout field is left blank the default search form layout and  your SLP style is used.   If Search Layout is modified the layout will take precedence over most of the Search Form settings  and the basic Store Locator Plus.