If you want to keep the legacy add-ons, do not upgrade the base plug-in to version 4.7 or above. All individual legacy add-ons have been phased out and replaced over the past 2 plus years due to security patches, coding changes, WP updates, maintenance overhead and inefficiencies that were no longer viable to support. To find the match to your Legacy Add-ons, see FAQ: Legacy versus featured add-on
Please follow the SLP news feeds for important information about updates.
Even if you received a notice in your WordPress admin panel that an update to your base plug-in is available, you do not need to click the update button. All version updates to SLP are optional. We do not auto-update like WordPress does.
If you already updated (most likely if you are reading this) and now try to roll back SLP to earlier version to o retain the Legacy add-on compatibility.
Note: Due to the security patches required by Word Press you may also need to rollback WordPress. Before attempting to roll back or downgrade WordPress or any plugins , make sure you have a recent back-up of your site. Do not attempt this on a live site.
The SLP author does not recommend rolling back versions of any software or WP.This is time consuming and messy, requires technical savvy, and you will miss important security patches. If you are confident that you know what is entailed and are willing to take the risk; it is still recommended to use a back-up service such as Vault Press or Jet Pack.
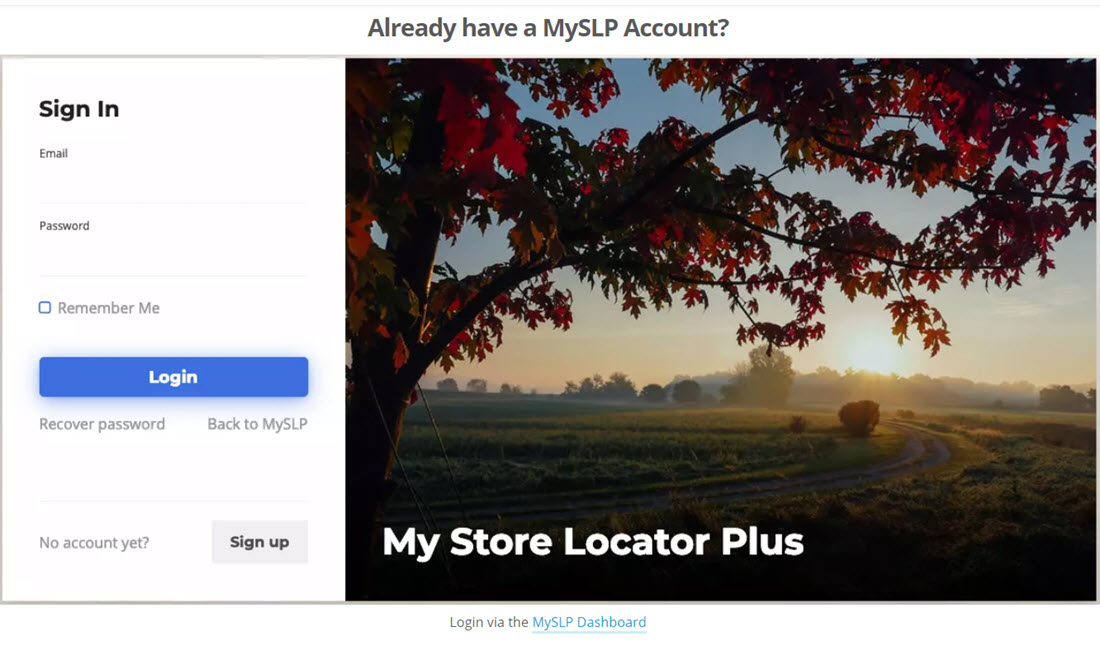
P.S. If you do not want the headache of maintaining back-ups , updating, obtaining a new Google API, you may want to consider moving over to a My SLP plan. See MYSLP SAAS
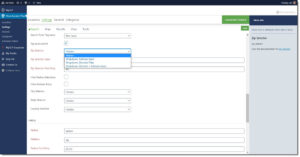
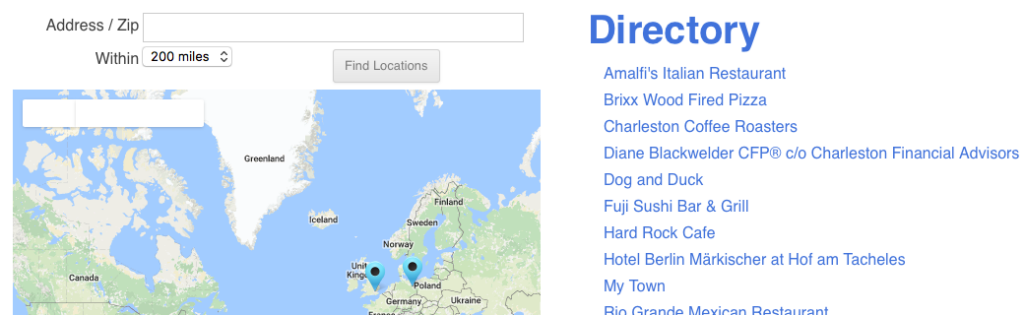
Feature to have the address to auto-complete the zip code based on your location database is available with the Premier/Enterprise or the Experience add-on
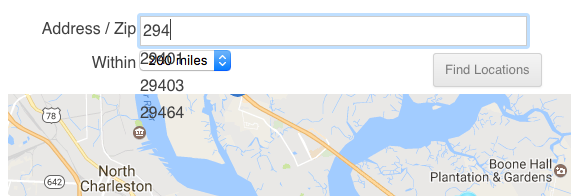
When 2 or more characters are typed in the address input box, input suggestions based on location data will appear.
None (default) – do not suggest address input.
Zipcode – suggest matching zip codes.
With Premier or SLP SaaS Enterprise you can also have a zip code drop down selector
If the formatting of the autocomplete is not the way you would like it to appear, reset the Search Form Style under appearance layout.
Locator Styling determines how the auto-complete drop down box will appear on your page.
This set of instructions will require you to be using the MySLP Professional level of service or higher. The Professional level includes the Experience add on that provides the Custom CSS rules interface. Instructions here are specific to MySLP but will work for WordPress plugin users as well.
Premier Members with an active subscription can restrict the number of locator queries that can be made by a single IP address. This feature can help prevent “location list theft” where a competitor uses the locator to scrape location information from a website or JavaScript query.
Note: In order to enable these settings you must enter your Premier Subscription user ID and Subscription ID under the General / Admin tab. When entered correctly the notice under “Add On Packs , Subscription Accounts” will tell you your subscription is validated. This feature is only functional while your subscription is active.
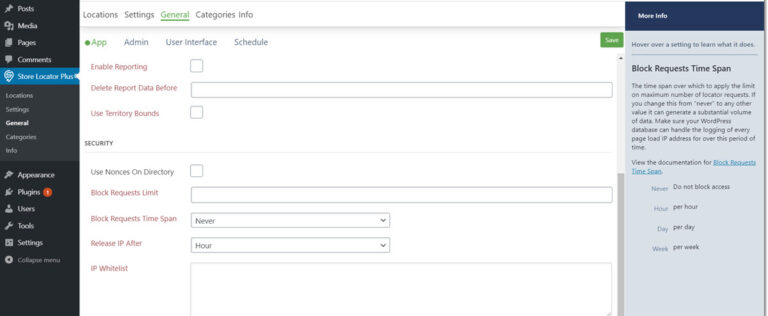
When your subscription has been validated you will see new options available to you under several Store Locator Plus tabs. The new Security settings will appear under the General /App subtab as shown below.
Block Requests Limit
This is the maximum number of location searches a user can perform within the Block Requests Time Span before their IP address is blocked from all locator requests.
This should be set to an integer value greater than 0.
The first page load request from an IP address is always allowed, even if this setting is 0.
If this is set to “2” and the Block Request Time Span is set to “Hour” the system will allow 2 location searches before the IP address is blocked.
The initial loading of the locator page will count as a “search” if you have the default “show locations at startup” enabled.
Changing this parameter will not release already-blocked IP addresses.
Block Requests Time Span
This setting determines over which period of time the locator request limit is checked. A user that has more than the Block Requests Limit number of locator searches performed in this time period will cause their IP address to be blocked from future location searches until their IP is “released” from the block list.
Setting this value to Never will disable the IP blocking system.
Changing this parameter will not release already-blocked IP addresses.
Release IP After
This is the maximum amount of time a request is “remembered” for a given IP address. Once this amount of time has passed since the most recent location request that triggered the block the IP address is “released” and once again free to perform location searches.
IP Whitelist
A list of IP addresses that will not be tracked by the blocker. This allows unlimited location lookups from these IP addresses.
Keep in mind that an IP address is not a unique “user” or “computer”. Many locations share an IP address such as a hotel or your local Starbucks. The limitations will apply to the entire group of users from the same shared IP address.
Once an IP address has been blocked, subsequent location requests are not tracked until the block has been released. This design lessens the server load in both volume of data stored and data I/O requests. It helps alleviate issues from possible denial-of-service type attacks where a bot loading requests in rapid succession could overwhelm the data storage and/or database I/O processing.
Blocking Locator Requests was added in the Premier Plugin version 4.7.11.
Search Form Style sets the styling for the interactive locator elements on your site. It uses pre-built jQuery Theme Roller style CSS designs to create a simple way to style interactive elements such as the autocomplete feature (available in WPSLP Experience or with MySLP Professional) on the address box. with Experience or Professional level plan additional search elements are available, including a one click checkbox to “Hide the search form” altogether.
The default styling is set to “None” which provides not special styling rules from interactive JavaScript elements in the locator interface. This allows the site designer to create their own styles for the website in which the locator will be placed.
Default styling for autocomplete is “none”. The theme in this example does not specifiy any ui-autocomplete styling. The background inherits the transparent background used by the website as the default for all divs.
The base service also includes the Base jQuery theme.
Setting A New Style
For WordPress plugin users go to the Store Locator Plus selection on the sidebar menu.
For MySLP users go to Store Locator Plus sidebar menu.
Select Settings/Search from the tab list.
Scroll down to the Appearance section and expand it by clicking the word “Appearance” if necessary.
Select a new style from the Search Form Style drop-down menu.
Available For WPSLP and MySLP
Search Form Style is a feature that is included in the base plugin of Store Locator Plus for WordPress and is available under Store Locator Plus for all levels of the MySLP service. Premier members on WPSLP and Enterprise Level users for MySLP will have multiple options for the Search Form Style.
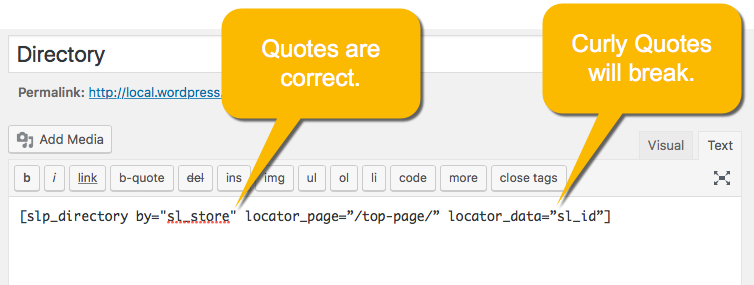
WordPress blog posts likes to use curly quotes instead of straight quotes whenever you write an article. Our documentation site is built on WordPress which means many of our articles are replaced any quotes we type in an article with curly quotes.
The problem is that the WordPress shortcode processor does NOT like curly quotes. If you use curly quotes in a shortcode attribute such as [slp_directory by=”city”] and those quotes are “curly”, WordPress treats the quotes as a plain-old alphabetic character just like the C-I-T or Y in “city”. In other words WordPress things you mean “by quote-city-quote” not “by city”.
Why is that an issue?
If you copy-and-paste most examples from this documentation site WordPress will copy the “pretty curly quotes” into your shortcode. If you paste that into your WordPress page it breaks.
Straight versus curly quotes when pasted into a page.
An example of how this can impact Store Locator Plus can be seen from my example where I pasted the slp_directory shortcode directly from the docs site into my test site. I get an invalid data query because WordPress added curly-quotes to my data field name. The SLP database does not have a field name quotesl_storequote but does have a field named sl_store.
The fix?
Make sure you re-type each quote manually. Typing the ” in your blog instead of copy-and-paste will ensure you are getting “straight quotes” in your shortcode attributes not curly quotes.
This is how the example looks now that the curly quotes have been replaced with straight quotes.
Territory Bounds module was moved from the General | Data tab to the General | Server | Web App Settings section. Cluster Map Markers is useful for a large dataset in close proximity to each other on the map.
URL Control
A URL Control module was been added to the application for Enterprise or premier subscribers. Enabling this module will turn on the interface to allow additional data to be presented in a web page URL to impact how the locator behaves.
URL Control : Allow Location In URL
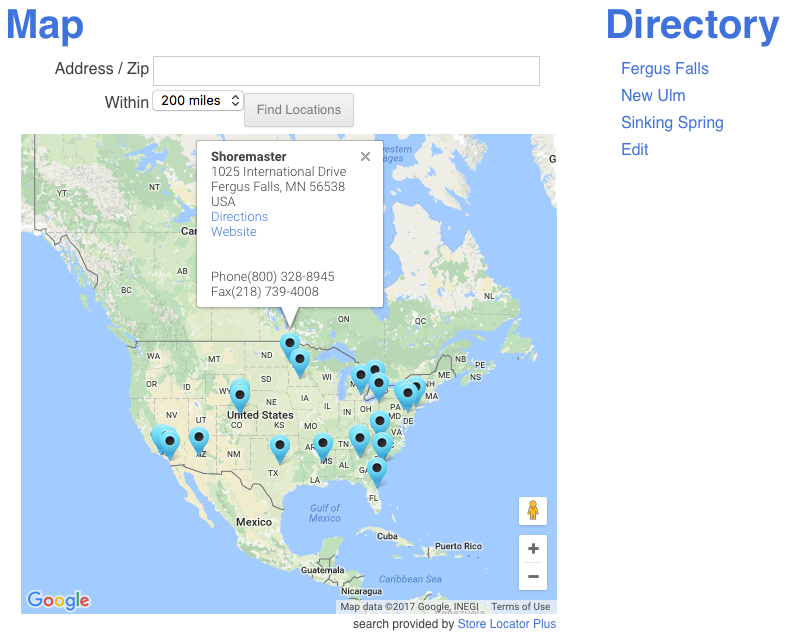
The first URL Control option is to pass a location ID in via a URL. Adding ?location=<id> to the end of a web page address that hosts the locator will cause the page to load with the specified location being highlighted as if the map marker was clicked. The default behavior is to show the info bubble for that location.
Results Layout ShortcodesThe Experience Add On allows you to custom tailor the look and feel of the Store Locator Plus plugin on your site. To accomplish this the plugin uses a combination of HTML and special shortcodes. These can be changed or checked off under the Settings* tab the plugin.
* formerly referred to as Experience tab, if you do not see Settings in the UI you are not using the latest version of Store locator Plus
The Overall Layout
This is set via the View / Layout setting. It determines the overall layout for the plugin based on 3 primary components: The Search Form, The Map, and The Results.
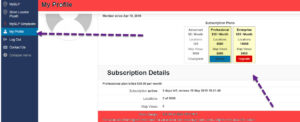
Click on an upgrade or downgrade button for the new level you wish to use.
Log in dashboard, select My profile, Make changes to your account subscription.
To cancel your subscription, please log into your account and click on the words “cancel subscription” under the Blue update card button.
Note: PayPal does not support direct subscription upgrades or downgrades. The subscription details will show the total paid for the newest level of service only. It will show $0.00 during the pending process and the accrued monthly amount once PayPal has activated your new subscription level on their end.
Preferred method of Payment is now done through our STRIPE card processing system. All transactions should be done in MYSLP under your profile to ensure proper credit to your account (this includes cancelling).
When the URL Control module is active you can enable location ID passing by turning on “Location Selection” under the General / User Interface tab.
When this is enabled you can pass in a location ID by adding ?location=<id> to the end of the page address where your locator map is deployed with the [slplus] shortcode.
When the location ID is present and the settings is enabled the specified location will be activated on the location map as if a user had clicked the marker on the map. This will show the info bubble by default.
Note:If cluster map markers are enabled they will be turned off for the initial page load. Subsequent input or searches by the user will re-activate the cluster map markers.
Note: When passing in a location ID via a URL the location latitude/longitude will become the center point for the map display. The location that is shown will be at the top of the result listing if sort by distance (default) is in place.
Location Limit
When the URL Control module is active you can enable location ID passing by turning on “Location Limit” under the General / User Interface tab.
When this is enabled you can pass in a limit for the number of locations to be returned when the map initially loads and when a search is performed by adding ?limit=<id> to the end of the page address where your locator map is deployed with the [slplus] shortcode.
Filter By Tag
When the URL Control module is active you can filter locations to show only this matching the tag(s) by turning on “Filter By Tag” under the General / User Interface tab.
This setting will require the Power Add On to be installed and active.
This setting will also require the following shortcode to be present in the Results Layout. The shortcode is standard in most Store Locator Plus provided Style Gallery Styles. It can be removed or changed if you have the Experience Add On active.
[slp_search_element selector_with_label="tag"]
An example of a Results Layout where locations are assigned a single tag. With multiple tags the entire list will be hyperlinked and will not likely perform as expected. Note the [slp_location data.sl_tags] takes the place of the [slp_location pro_tags] shortcode that is set by default on most Style Gallery styles.
If you have URL controls enabled you can now pass in location filters based on a tag by adding ?only_with_tag=red to the end of your locations page URL.
Combining URL Options
You can combine the URL control options by using standard URL notation for parameter passing.
The standard is to define the first parameter by starting with a question mark.
Additional parameters are started with an ampersand.
To pass a location ID and a location limit, in this example to show ONLY the location specified, you would add ?location=32&limit=1 to your map page URL.